
Affinity Photo HDR: How to Tone-map Images?
High contrast scenes are the bane of digital photography. Even though cameras are continually improving. Capturing high contrast scenes often requires merging several exposures into a single image using a HDR tool like the inbuilt Affinity Photo HDR Merge tool.
If you’ve ever tried capturing the bright sky against a dark foreground on a sunny day, you’d know the challenge. Unlike human eyes, digital cameras cannot capture both the brightest and darkest parts of an ultra-high-contrast scene, with equal clarity.
Get my Beginner-friendly Quick Start Guide to Affinity Photo - for Free
When you set the exposure for the dark areas, the highlights get blown out to white. When you do the opposite (expose for the bright sky), the dark areas lose all the detail.
You can fix this to some extent with Photoshop or by using the Highlights/Shadows slider in Adobe Camera Raw (ACR) or Lightroom, but High dynamic range (HDR) photography is by far the best solution to this problem.
HDR photography works by taking multiple snaps of a high-contrast scene at different exposure levels and then blending them together in post-processing to create a single image comprising of the best parts of each snapshot. But one problem with HDR images is that they are not compatible with regular, low-contrast display tools. HDR images are 32-bit files, while most monitors can display 8 or 16-bit files.
That means you need to compress the dynamic range of your HDR photo in order to display it on a regular monitor. The result could be a flat-looking, low-contract HDR image.
But don’t worry because you can fix this with tone mapping. Instead of compressing the whole dynamic range at once, tone mapping allows you to adjust the contrast level locally. It still squeezes the dynamic range to make your photos displayable on any regular monitor, but the image retains its HDR look for the most part.
You can use any HDR tool to tone-map your images, however, in this Affinity Photo HDR tutorial we look into how you can get the best results if you want to create HDR images in Affinity Photo.

Tone Mapping With HDR merge in Affinity Photo


Once you’ve taken a series of photos using your camera’s ‘bracketed exposure’ function, like the series of images above, you should import them into your computer. Now you can start the Affinity Photo HDR merge process. After the merge, you’ll use the tone mapping persona in Affinity Photo to fine-tune your final image. Here are the steps.
Step One – In Affinity Photo, go to File and then scroll down and click on New HDR Merge, which will open a new dialog box. Now click on the “Add” button below the dialog box and upload all the bracketed photos you want to merge. Underneath the dialog box, you’ll notice a few options, such as, “Automatically align images”, “Automatically remove ghosts” and “Tone map HDR image.” These settings are checked by default, and typically you’ll need to keep them checked.

For instance, keep “Automatically align images” checked, if you didn’t use a tripod or your camera moved while shooting the bracketed images. If your subject moved between shots, you want to keep “Automatically remove ghosts” ticked. Keeping the “Tone map HDR image” box checked means that you’ll be automatically directed to the Tone Mapping persona in Affinity Photo after the HDR merge has completed.
Step Two – So now you are all set to start Affinity Photo's HDR merging. Click “OK” and wait until the merging process completes. Depending on your computer's resources this proces might take seconds or minutes. After the HDR merge the resulting image is displayed in the Tone Mapping persona.
As a side note, you don’t essentially need an HDR-merged image for tone mapping. You can indeed tone map a single 32-bit HDR photo or even a non-HDR (8 or 16 bit) image. (More on this later.)
Step Three – Within Tone Mapping persona in Affinity Photo, you’ll see a number of preset effects on the left. You can preview the outcome of each effect by clicking on them one by one. It is also possible to import or export presets to your Affinity Photo program. You can even save and set your own tone map presets.

Tone Map Presets in Affinity Photo
Step Four – Once you’ve selected a preset, you can move on to the right panel where you’ve a selection of tone-map related adjustments. For instance, you can manually control the ‘tone compression’ and ‘local contrast.’

Tone Map Settings in Affinity Photo
Tone compression allows you to adjust the tonal range of the image, while adding local contract helps improve your image's clarity.
Step Five – On the right panel of Tone Mapping persona, you have another very useful setting called the Curves, which allows you to manually adjust tonal range using a graph.
There are many other settings. You can use some of them to fine tune your image. For instance, the saturation setting allows you to adjust the color tone and intensity.
Vibrance, too controls the color intensity, but without affecting the color tone. The Shadows & Highlights slider helpsyou highlight certain parts of the image. You can also adjust the black point, exposure level, contract and brightness, white balance, and detail refinement.
Play with these adjustments until you’re satisfied with the final result. Alternatively, you can also wait with the adjustments and then add them to your image as adjustment layers in the Photo persona.
Step Six – Once you are done with the adjustments, click apply on the context tool bar up at the top.
That’s it. You’ve successfully tone-mapped your image. Now the system will automatically bring you back to the default Photo persona.
You can save the image in the program's default format and then export it to JPEG or TIFF file.

Tone Mapping a Single Image
As mentioned earlier, it is possible to tone map a single 32-bit HDR photo or even a non-HDR image in Affinity Photo. But how will you do that?
First of all, try to shoot in RAW format. Shooting in RAW gives you more to work with in post.
Another good idea would be to shoot one or two stops under the perfect exposure, so that you don’t end up blowing out the bright areas but still retain most of the detail in dark areas.

RAW Source Image
Once the shooting is done, simply open the RAW image (with the default tone-curve applied) in Affinity Photo. At thispoint, if the image looks too punchy, you may want to pre-process the RAW image to make it look flatter and more suitable for tone mapping. Here’s how you can do that.

Click to open the Assistant menu at the top right
Then set the 'Tone curve' option to 'take no action.' This will give you a flatter looking image.

You can adjust it further using the sliders on the right panel. For instance, consider adjusting the shadows & highlights, brightness, and saturation levels until you’re satisfied with the result. Remember, at this point, your goal is to give the image a flat, washed-out look, so you’ll have more to work with during the tone mapping process.
Now click on Develop on the top left and then and then click on Tone Mapping Persona.
Once you’re within the Tone mapping window, the next steps would be almost the same as described above (from step threeonward.)

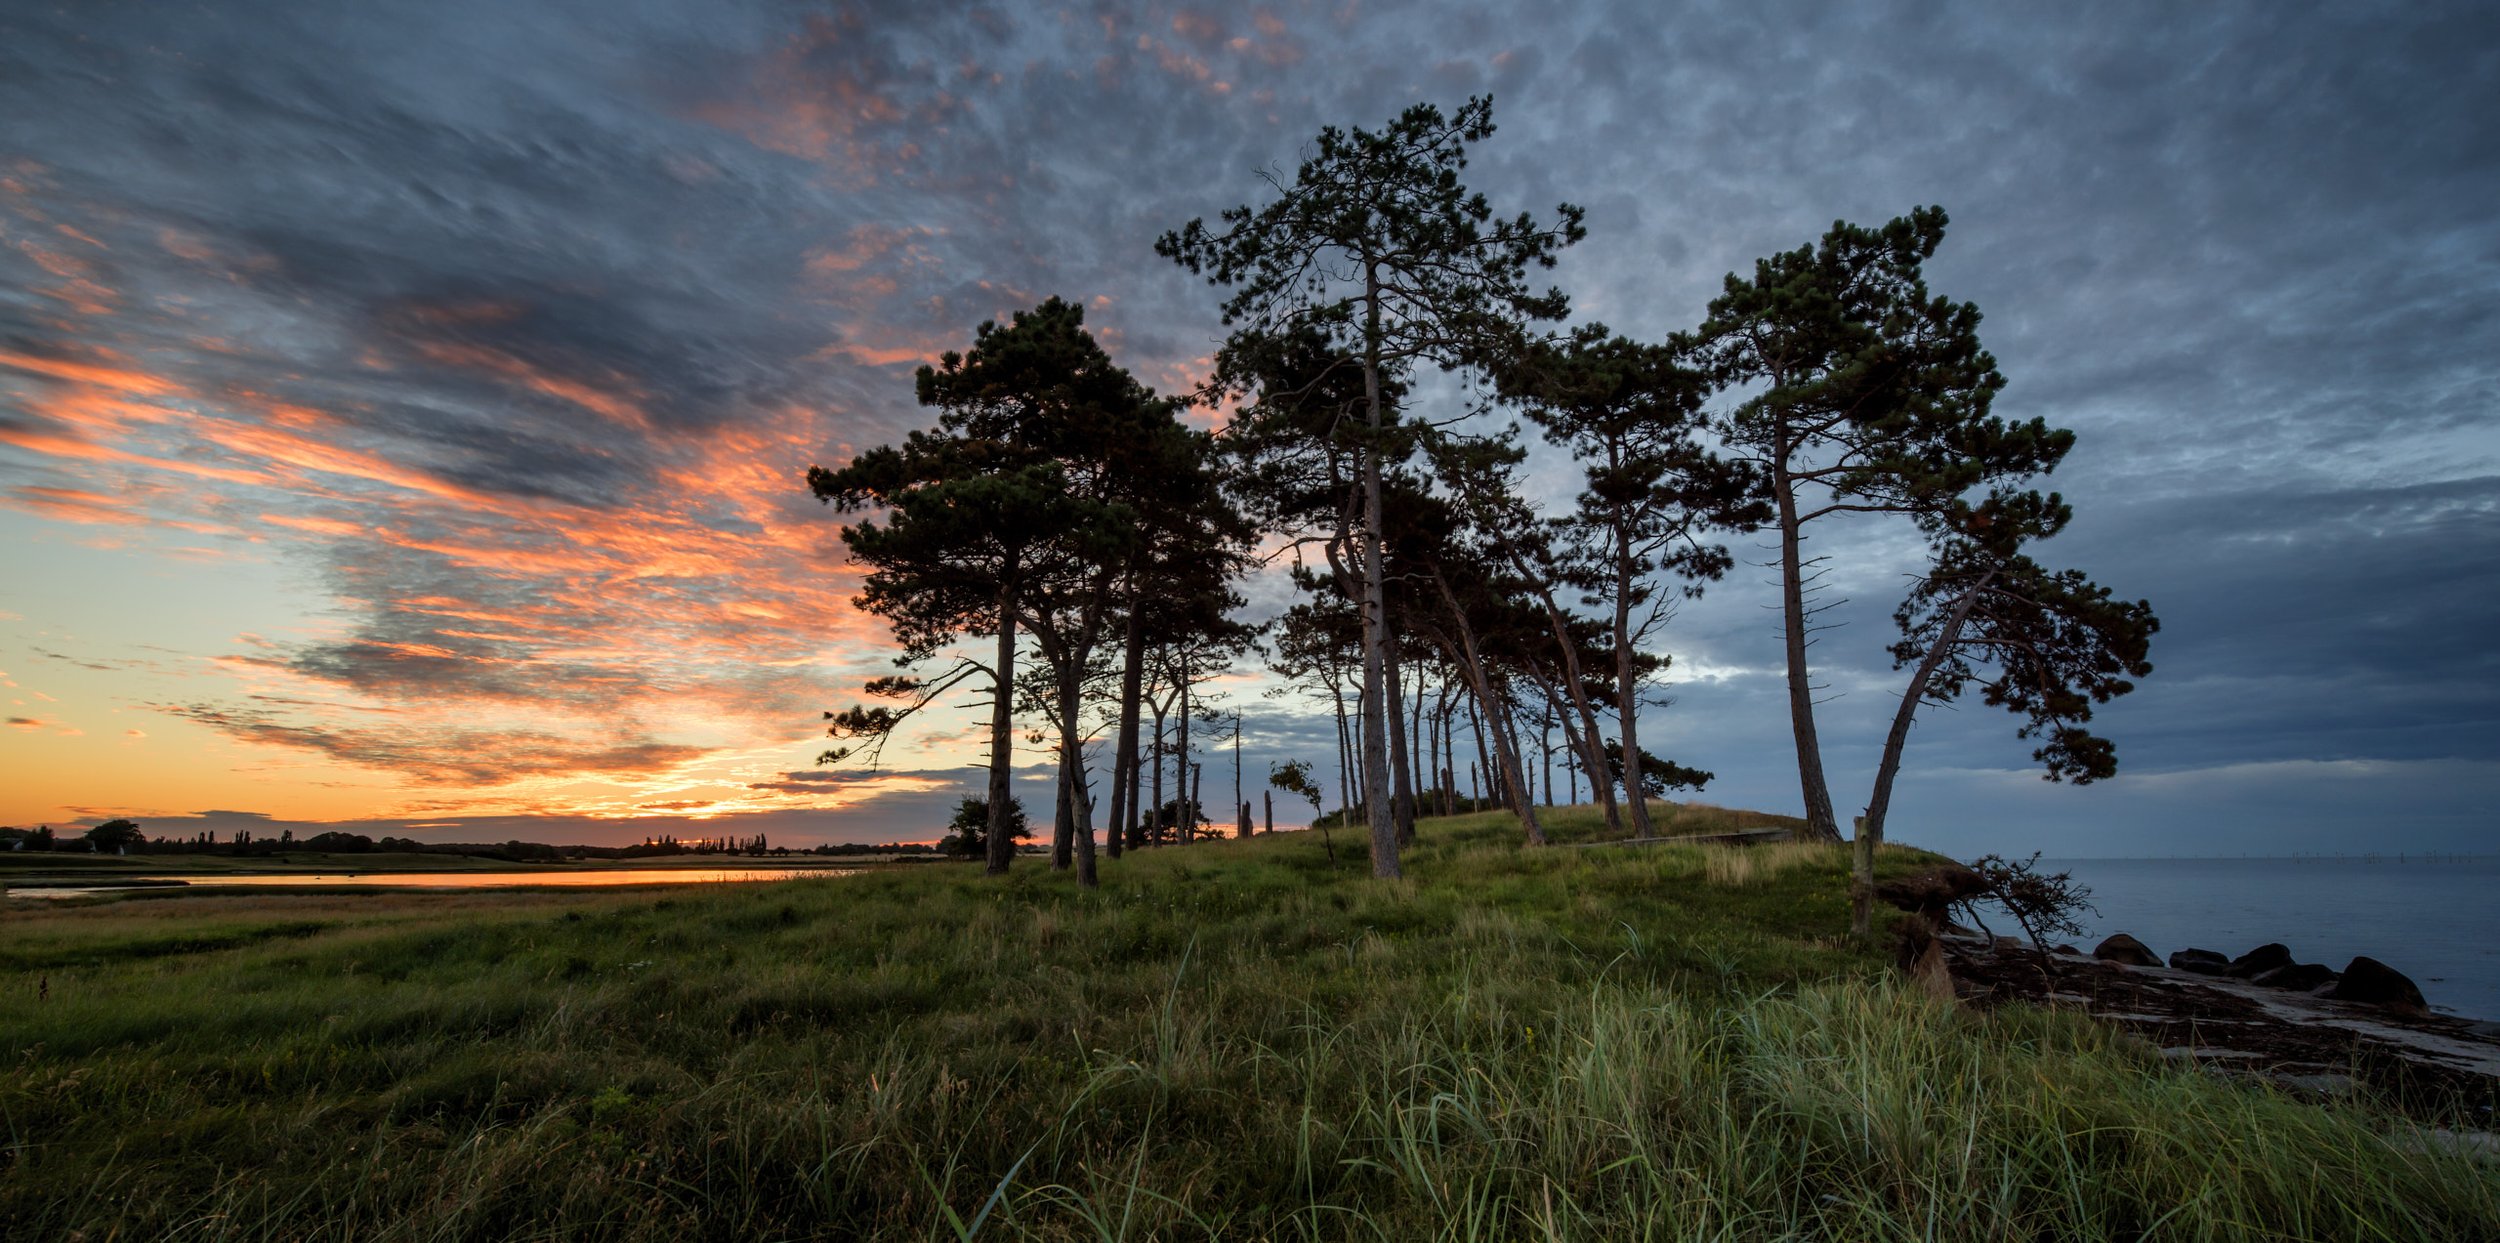
Result of using the Affinity Photo HDR Merge Tool.
Tone mapped result from a single image in Affinity Photo
Once you’re done with the tone mapping, click Apply. And there you are! You’ve successfully given an HDR-like look to your single RAW File. Now continue to improve your image by using your preferred Affinity Photo workflow to lift the image even further.
Tonemapping HDR photos vs. Blending Exposures Using Blend Ranges or Luminosity Masks

Unlike Affinity Photo HDR merge, luminosity masks allow you to control the blending process.
The tone-mapping feature in Affinity Photo works well and more or less on the level with other automated HDR tools. However, in my opinion, it is not the best way to combine multiple exposures into a single image achieving a higher dynamic range. Automated HDR tools, including the one in Affinity Photo, have to use a level of guesswork, which might not give you the result you want.
Instead, I prefer to either use the blend range tool in Affinity Photo or create luminosity masks. Blend ranges allow you to set the level of opacity of any tonal range in your image and letting, i.e., the overexposed highlights on one layer, become transparent so that you can see the underlying layer with correctly exposed highlights. Similarly, by creating luminosity masks, you can create perfect selections based on luminosity values. By using a brush on a masking layer combined with the luminosity selection, you have full control of which part of an image you blend and which you don't. In my Advanced Affinity Photo Video Course, I show you how to create your own luminosity masks, and how to use them for blending several images together.
Concluding words
The Affinity Photo HDR merge feature is a pretty straightforward tool to create awesome looking images where you can retain both the bright highlights and the deep shadows by bracketing a set of images.
What is your experience with using Affinity Photo to create HDR photos? Share your thoughts below in the comments.
If you haven't tried Affinity Photo yet, you can get it from Serif.