
How to Crop in Lightroom Classic
With Lightroom, you can completely alter the look and feel of your photo - turning a plain landscape into an incredible work of art. Cropping in Lightroom CC is one of the tools that you with just a few steps can get your image in the right direction.
Learning how to crop an image in Lightroom is a simple skill that can improve the quality of your photography.
Get my eBook: 25 Techniques all Photographers Should Master - for Free
Crop photos in lightroom develop module
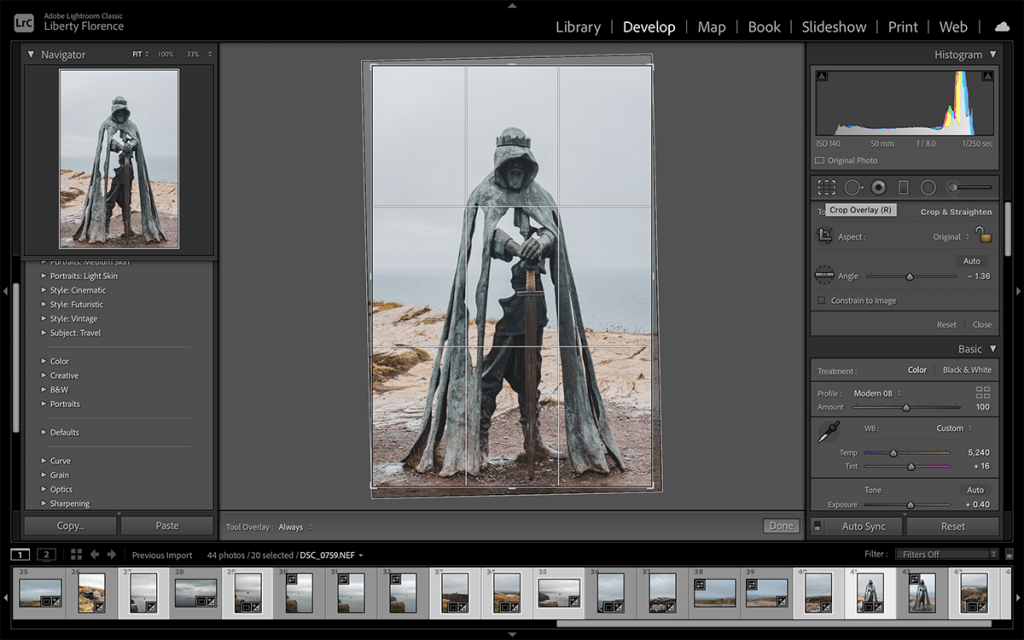
Lightroom Develop Module + Crop Panel
Where To Find The Crop Tool In Lightroom
The crop tool can be found in the Develop Module in Lightroom. You can't crop in the Library module.
To access the crop tool, go to the editing toolbar on the right-hand side of your screen and select the crop tool button. This should look like a small dotted box to the bottom left of your histogram.

Crop panel in Lightroom
The Crop Panel
You can also easily access the crop panel by pressing R. This will open the crop panel, where you will have a variety of options to make adjustments to your crop in Lightroom. We will cover all of these in more detail.
You will notice that your image is now surrounded by a white box and has a grid on top. This is your ‘crop box’ and by clicking on the sides or corner of this white box you can adjust how much you want to crop your image.

Crop overlay for photos in lightroom

Step-by-Step How To Crop A Photo In Lightroom
There are three key methods to crop a photo in Lightroom: 1. click and drag, 2. using a preset aspect ratio, 3. using the angle slider.
1. Crop Photos By Dragging Corner Handles
This is the most basic method to crop photos in Lightroom. When you have the crop tool selected, the white crop box overlay will automatically appear on your photo.
You can change the crop overlay in Lightroom to use the golden spiral, triangles, or one of the other overlays available.
By clicking and dragging the corners and sides of this white box, you can drag the crop area to fit the composition you like. To adjust the width, click and drag either the left or right sides of the box. For the height, click and drag either the top or bottom sides of the box.
To alter both the width and the height, grab a corner of the crop overlay box and drag. Hold down the Alt/Option key on your keyboard to adjust opposite sides of the crop overlay simultaneously.
2. Crop Photos Using Aspect Ratios
The crop frame tool can be found by clicking on the box-shaped icon to the left of the word ‘aspect’ in the crop panel. This tool allows you to manually draw a new crop with an established aspect ratio. This means you can click and drag to create a precise crop anywhere on your photo.

use the aspect ratio tool to draw the crop on your image
To crop to an aspect ratio, select your desired ratio from the dropdown menu, or enter a custom ratio. Once you have selected your ratio, the Lightroom crop overlay will automatically adjust to fit that ratio. Make sure that while you are doing this, the lock icon is set to ‘locked’ mode.

change the aspect ratio used to crop your image
How to Change the Crop Orientation in Lightroom: Use the Crop Frame Tool
If you draw the crop to be taller than wider, the crop frame will change its orientation while you drag the crop over the image.
Crop to Custom Dimensions
You might need a different aspect ratio than the presets used by Lightroom. The preferred aspect ratios for Instagram images are 4:5 for portrait, 1:1 for a standard square post, or 1.91:1 for a landscape. To achieve a 1.91:1 aspect ratio, you will need to enter a custom aspect ratio.

enter custom cropping ratio
3. How to Rotate and Crop in Lightroom: Use the Angle Slider
The angle slider is located directly underneath the aspect tool. By moving the slider to the left or right, Lightroom will rotate and crop your image. This can be useful for achieving a certain aesthetic effect or to crop and straighten an image so you get an even horizon.

use the crop ruler to straighten and rotate your image in Lightroom
If you press the ruler icon in the crop panel, your cursor will change into crosshairs. Click-drag between two points on your image that you believe should be on equal height (like a line or horizon) to straighten and rotate the image. This will also affect the image crop, as the image is rotated to straighten the image.
How To Crop Multiple Photos In Adobe Lightroom
Manually cropping a batch of photos can be time-consuming and frustrating. However, there is an easy method to batch edit your photos.
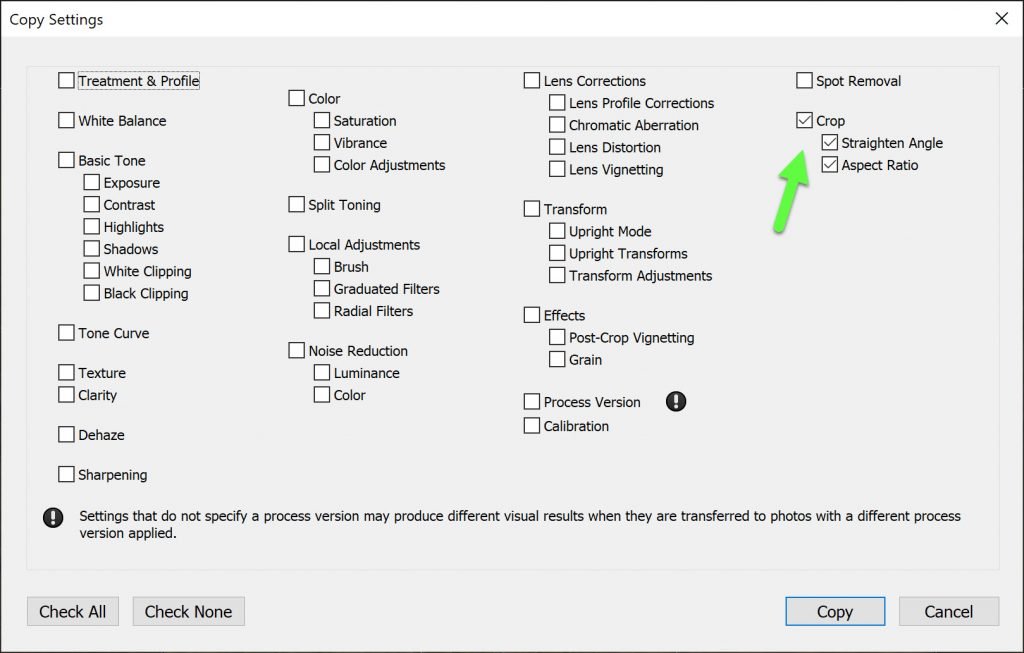
Once you have made your crop, click on the ‘Copy’ button to the bottom left of your Lightroom interface. This will open a dialogue where you can select the changes you have made to your photo that you would like to copy.

copy settings
Deselect any you don’t want, and make sure to select the ‘crop’ box. Click copy to close the dialogue box.
copy crop settings LR
To select multiple images in the develop module, hold down Cmd/Control and select each photo in the filmstrip that you would like to make changes to. Then, with all of your images highlighted, click the ‘Paste’ button to the bottom left of your Lightroom interface. This will apply all of your crop changes to your selected images.
Conclusion
Cropping is a simple yet effective tool, and there are many ways to achieve different crops in Lightroom. It’s helpful to familiarize yourself with the different methods, so you can choose the crop that fits your needs best.
Featured Photo by Bailey Zindel on Unsplash